Sunday, January 24, 2010

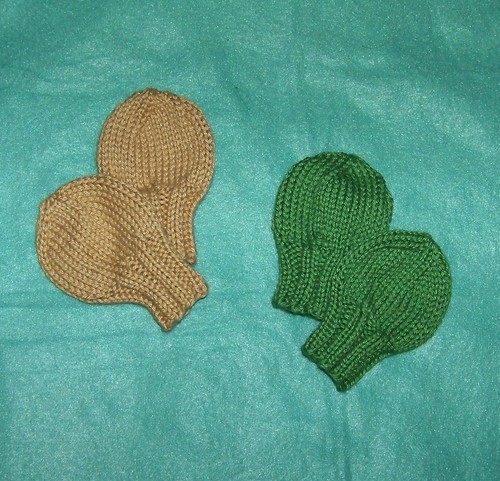
No Scratchies Newborn Mitts


Materials:

Sport weight yarn (the softer the better…examples use Knit Picks Shine Sport)

US5 DPS’s

Tapestry needle


CO 24 stitches
R1 Join in a loop witout twisting and work K2P2 rib for 12 rounds
R2 (K4, M1) around (30 sts)
R3 K around
R4 (K5, M1) around (36 sts)
R5 K around for 10 rounds
R6 (K7, K2tog) around (32 sts)
R7 (K6, K2tog) around (28 sts)
R8 (K5, K2tog) around (24 sts)
R9 (K4, K2tog) around (20 sts)
R10 (K3, K2tog) around (16 sts)
R11 (K2, K2tog) around (12 sts)
R12 (K1, K2tog) around (8 sts)
Cut yarn and draw the tail through the remaining stitches, pull to the inside of the mitt, pull tight, tie off, and weave in the ends. Repeat for the second mitt.

mittsgrassmittswillow
101_2716 Pin It

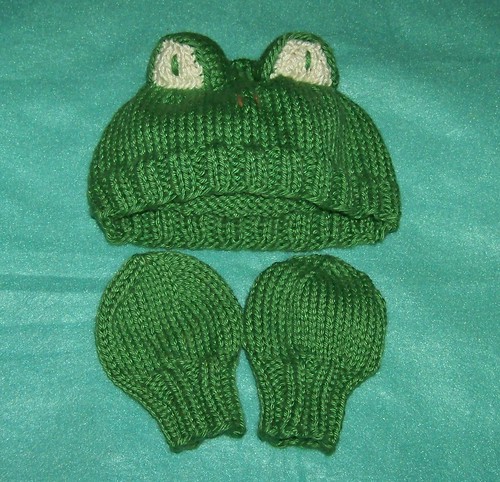
Newborn Froggie Hat


Materials:

Sport weight yarn (example uses Knit Picks Shine Sport in Grass, about 2/3 of a skein, and scraps of White)
US 5 DPN’s
Tapestry needle
Measuring tape


Hat:

CO 80 stitches (on US 6, then transfer to US5 or DPNs)

R1 K2P2 rib for 6 rounds
R2 K for 2 inches
R3 (K4, K2tog) around (*Note: do not worry if decs do not come out even, it will work out in the end :D)
R4 K for 3 rounds
R5 (K3, K2tog) around
R6 K for 3 rounds
R7 (K2, K2tog) around
R8 K for 3 rounds
R9 (K, K2tog) around
R10 K for 3 rounds
R11 (K2tog) around
R12 K for 3 rounds
Break off yarn leaving a long enough tail to run through the remaining live stitches, tie off, and weave in.

Eyes:

CO 20 sts in main color on US5
R1 K across
R2 P across
R3 K, K2tog, K14, SSK, K
R4 P across
R5 K, K2tog, K12, SSK, K
R6 P across
R7 K, K2tog, K10, Ssk, K
R8 P across
R9 Bind off

CO 8 sts in white
R1 P across
R2 K, K2tog, K2, SSK, K
R3 P across
R4 K, K2tog, SSK, K
R5 P across
R6 Bind off, leaving a long enough tail to attach the whites to the outer eye piece.

Sew the white and outer eye pieces together using a whip stitch, embroider the iris in the eye, sew the eyes in place (about 8 to 10 rounds down from the crown) stuffing with a tiny bit of poly. Embroider ‘nostrils’ in place if desired.

Some suggested supplies for this project:
Pin It

Wednesday, January 20, 2010

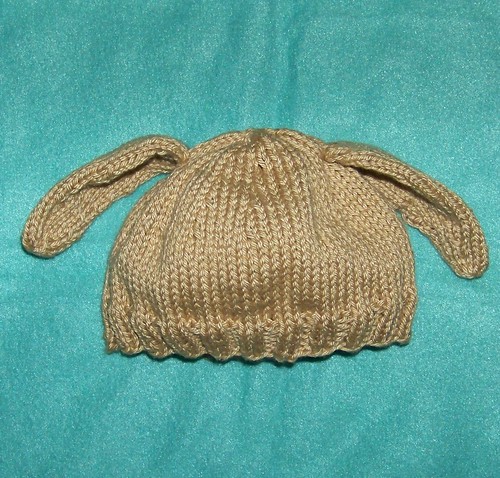
Newborn Puppy Hat

Designed to go with my expected little one's coming home outfit, this adorable hat is the perfect newborn accessory.

Materials:

Sport weight yarn (example uses Knit Picks Shine Sport in Willow, about 2/3 of a skein)

US 5 DPN’s

Tapestry needle

Measuring tape


Hat:

CO 80 stitches (on US 6, then transfer to US5 or DPNs)

R1 K2P2 rib for 6 rounds
R2 K for 2 inches
R3 (K4, K2tog) around (*Note: do not worry if decs do not come out even, it will work out in the end :D)
R4 K for 3 rounds
R5 (K3, K2tog) around
R6 K for 3 rounds
R7 (K2, K2tog) around
R8 K for 3 rounds
R9 (K, K2tog) around
R10 K for 3 rounds
R11 (K2tog) around
R12 K for 3 rounds
Break off yarn leaving a long enough tail to run through the remaining live stitches, tie off, and weave in.

Ears:

CO 20 stitches on us 5 DPNs

R1 K 2 rounds
R2 K1, M1, K8, M1, K11
R3 K 2 rounds
R4 K1, M1, K10, M1, K11
R5 K 6 rounds
R6 K1 K2tog, K8, SSK, K11
R7 K 2 rounds
R8 K1 K2tog, K6, SSK, K11
R9 K 2 rounds
R10 K1 K2tog, K4, SSK, K11
R11 K 2 rounds
R12 K1 K2tog, K2, SSK, K11
R13 K 2 rounds
R14 K1 K2tog, SSK, K11
R15 K 2 rounds
R16 K2tog, SSK K10
R17 K 2 rounds
R18 K2tog, K10
R19 K 1 round
Break yarn and draw through live stitches.

Repeat for the second ear. Sew ears in place.

puppy with mitts


Puppy hat with outfit


Some suggested supplies for this project:
Pin It

Tuesday, January 19, 2010

Velvety Newborn Cocoon

This cocoon is super soft and fuzzy, and soooo squishy! I absolutely cannot wait for my new little one to arrive just so I can use it! (I will update with pics of him when he gets here!!!)


Materials:

Lion brand Velvet Spun yarn…about 2 skeins (or a comparable soft and plush bulky weight yarn)

Size US11 DPN’s

Tape measure


Cast on 5 stitches and work an I-cord for about 8 inches (this will be knotted later)
R1 Split sts onto 2 DPNs (add DPNs as needed through out the pattern) Kf&b around
R2 K around
R3 Repeat rounds 1 & 2 until you have 40 stitches.
R4 K for 3 inches
R5 Bind off 16 stitches, continue knitting around
R6 Cast on 16 sitiches, continue knitting around
R7 K until garment measure 17 inches from the top
R8 (K6, k2tog) around
R9 Knit 2 rounds
R10 (K5, k2tog) around
R11 Knit 2 rounds
R12 (K4, k2tog) around
R13 Knit 2 rounds
R14 (K3, k2tog) around
R15 Knit 2 rounds
R16 (K2, k2tog) around
R17 Knit 2 rounds
R18 (K, k2tog) around
R19 Knit 2 rounds
R20 (k2tog) around
R21 Knit until tail measure about 6 inches, (or to the end of your yarn)
Pull yarn through live stitches and up into the “tail”, pull tight, weave in if desired,
Tie top and bottom “tails” in knots…I used a double loop knot on the top, and a regular knot on the bottom. To do the double loop, I make a small loop close to the top of the cocoon, wrap the tail gently around the loop twice, then tuck the end of the tail through the loop and gently tug…I wanted it to stay sort of fluffy, not super tight.

Pin It

Monday, January 4, 2010

Li’l Aries Longies

Materials:

Yarn: Worsted Weight Wool
Recommended needles: US 6 straight (for cast on), US 5 circular or DPN’s (for waist and leg cuffs), US 7 circular or DPN’s (for body and girly options {as instructed in the Li‘l Aries Soaker Pattern}), US 8 (for leg cuff bind offs, and skirty bind-offs {as instructed in the Li‘l Aries Soaker Pattern})
Stitch markers, at least 4
Stitch holders or scrap yarn
Tapestry needle
Tape Measure

**Read all instructions carefully first.**

Suggested gauge: 5 ½ stitches per inch & 6 rows per inch in stockinet on US 7

General measurements (unstretched to slightly stretched)
NEWBORN= WEIGHT up to 11lbs WAIST 11-15 in. RISE 14-15in. INSEAM 5”
SMALL= WEIGHT 11-17 lbs WAIST 12-18 in. RISE 15-16 in. INSEAM 7”
MEDIUM= WEIGHT 15-20 lbs WAIST 12.5-20 in. RISE 16-17 in. INSEAM 9”
LARGE= WEIGHT 20-24 lbs WAIST 13-22 in. RISE 17-18 in. INSEAM 11”
X-LARGE= WEIGHT 25lbs+ WAIST 14-24 in. RISE 18-19 in INSEAM 13”

Weights are just an estimate as each baby is built differently. To measure for the waist, measure just above your baby’s diaper, around the waistline. To measure for the rise, measure over you baby’s diaper, from the top front to top back (approx from navel to mid-back). To measure the inseam measure from crotch to ankle on the inner part of the baby’s leg. If your baby fits within the measurement range for a particular size, use those figures in the pattern. If your baby fits most of the measurements for a particular size, use those figures in the pattern, and follow the customization instructions in those areas where your baby’s measurements differ.

Instructions are for Newborn(Small, Medium, Large, Extra Large)

Waist band:

Cast on 64(80, 96, 112, 128) stitches on US 6 needle (maintains stretch). Transfer stitches to US 5 circular or DPN’s, place stitch marker and join in a loop.

1. For a drawstring waistband: K2P2 Rib for 8(10, 12, 14, 16) rounds. You may wish to change yarn colors after your ribbing. (TIP* Tie the tails of your old color and new color in a tight bow as close to the needles as you can. This will make picking up the last increase stitch in the next section easier, keep the ends from pulling loose as you knit, and allow you to weave the ends in later.)

For an elastic waistband: Knit for 8(10, 12, 14, 16) rounds., Purl for one round, then work your K2P2 ribbing for 8(10, 12, 14, 16) rounds. You will eventually fold the band in at the purl round and sew it down over a loop of elastic with a length of yarn. To measure your elastic, the average is to subtract 10% from your baby’s waist measurement. (ex: Your baby’s waist measures 15 inches, 15-10%=13.5 inches, so you will cut your elastic 13.5 inches, and sew securely it in a loop with a needle and thread.) This option will also work for an encased drawstring.

Body:

Switch to US 7 circular or DPN’s
1. K4(5, 6, 7, 8), M1 (Insert left needle from the front and pick up the bar between the stitches, knit into the back.), around. (80, 96, 112, 128, 144 stitches)

2. K 2(3, 4, 5, 6) rounds.

3. K 20(24, 28, 32, 36) stitches, place hip marker, K 40(48, 56, 64, 72) stitches, place hip marker, K remaining 20(24, 28, 32, 36) stitches.

4. Work Wrapped Short Row Set:
Work around to the turning point (second hip marker placed), turn, yo purl-wise. {Purl-wise YO=bring yarn behind needle and insert needle into first stitch purl-wise}…Purl across to the turning point (first hip marker placed), turn, yo knit-wise…{Knit-wise YO=bring yarn in front of needle and insert needle into first stitch knit-wise}…Knit across to the last stitch before the marker, slip that stitch purl-wise, remove marker, replace stitch on left needle, place marker on right needle. K2tog (yo and 1st stitch after the ‘gap’) Continue knitting around past the joining marker, to the stitch before the next hip marker. Slip that stitch knit-wise, remove the marker, slip the next stitch knit-wise, knit those 2 stitches together (as in SSK), place marker on right needle. Continue knitting around to the joining marker

5. K 2(3, 4, 5, 6) rounds.

6. Repeat 4&5 3 more times. (If you want even more rear coverage add an extra repeat of round 4 here, adding about ½ inch to the total rise measurement for the size you are working in step 7)

7. Knit until the total rise (front and back together) measures 12(13, 14, 15, 16)inches. If you need a longer rise than is listed in the chart above for the size you are making, add additional rounds here (6 round per inch). On the last round, count 20(24, 28, 32, 36) stitches from the first hip marker and place a marker for the rear gusset placement.

gusset


Gusset:

1. Knit around to 3(4, 5, 6, 7) stitches past joining marker.
2. Purl back 3(4, 5, 6, 7) stitches past joining marker, turn (you will have a total of 6, 8, 10, 12, 14 gusset stitches at this point)
3. K1, M1, k to last stitch, M1, K1, turn
4. Purl across, turn
5. Repeat 3 and 4 until there are 12( 16, 20, 24, 28) gusset stitches on your needle.
Cut tail to weave in and slip gusset stitches onto a stitch holder or dpn

8. Place the next 34(40, 46, 52, 58) stitches on a stitch holder or scrap yarn (to 3(4, 5, 6, 7) stitches before rear marker). Join a new yarn and follow gusset instructions for the rear half of the gusset, cutting a tail that is at least 12(14, 16, 18, 20) inches long for seaming and thread onto a tapestry needle. Kitchener the gusset together…
Always keep yarn below needles…
1. Insert tapestry needle into the 1st stitch on the front needle as if to purl.
2. Insert tapestry needle into the 1st stitch on the back needle as if to knit.
3. Insert tapestry needle into the 1st stitch on the front needles as if to knit and remove stitch from the needle.
4. Insert tapestry needle into the next stitch on the front needle as if to purl.
5. Insert tapestry needle into the 1st stitch on the back needle as if to purl and remove stitch from the needle.
6. Insert tapestry needle into the next stitch on the back needle as if to knit.
Repeat steps 3 to 6 until all stitches are bound off.

gusset closeup, kitchener row


starting the legs


Legs:

1. Join a new yarn and pick up 10(12, 14, 16, 18) stitches along the edge of the gusset, place a marker and knit around the leg opening for 30(42, 54, 66, 72) rounds You will have 44(52, 60, 68, 76) leg stitches. If you need a longer inseam than is listed in the chart above for the size you are making,, add additional rounds before beginning a cuff option. (6 rounds per inch)
Leg options:
1. Work only 12(14, 16, 18, 20) rounds for shorties
2. Work only 15(21, 27, 33, 39) rounds for “board” shorties
3. Work only 20(28, 36, 44, 52) rounds for Capri’s


cuff


Cuff options:
1. Knit to last round in stockinet for a rolled cuff
2 Knit the last 3 or 4 rounds in seed stitch for a straight cuff.
3. Switch to US5 DPN’s and knit the last 4(6, 8, 10, 12) rounds in K2P2 ribbing for a ‘sweatpants’ cuff (bind off with US6 for this option)
4 Knit the last 2 rounds in K2M1 for a ruffled cuff
5. Knit the last 8(10, 12, 14, 16) rounds increasing about 4 stitches per round and using the ruffle cuff at the bottom for a flared leg.
6. Work a swirled cuff by knitting the last 9 rounds as follows: 3 rounds garter, 3 rounds K1P1, and 3 more rounds garter.
7. Work the last 6 rounds in box stitch…K2P2 for 2 rounds, P2K2 for 2 rounds, K2P2 for 2 rounds.
8. Work a double ruffle by purling one round at the bottom of the leg, knitting each stitch front and back the next round, and knitting 4 more rounds and binding off, then pick up both the top and bottom purl bumps of the purl row and knitting 4 more times around
(You can work other edging patterns as long as they are worked in multiples of 2 or 4 stitches)

Bind off with a size 8 needle unless otherwise indicated, and in stitch pattern as needed.

Repeat for the second leg opening, picking up stitches from the stitch holder or scrap yarn and across the gusset as indicated for each size.

Footie option:
Work the sweatpants cuff option as directed for the size you are making. Do not binding off. Set up your US5 DPN’s as follows: Beginning at the center back of the leg, place 16(19, 22, 25, 28) stitches on the first needle (referred to as needle 1). Place the next 12(14, 14, 18, 20) stitches on the second needle (referred to as ‘toe’), and the remaining 16(19, 22, 25, 28) stitches on the third needle (referred to as needle 3). Place marker.
1. Knit the stitches on needle 1
2. A) Knit the toe stitches across, turn
B) Purl the toe stitches across, turn
Repeat A&B 1(2, 3, 4, 5) more times (4, 6, 8, 10, 12 rows of K and P)
Knit across toe once more
3. Pick up 5(7, 9, 11, 13) stitches along the side of the toe and knit the stitches on needle 3
4. Knit across needle 1, picking up 5(7, 9, 11, 13) stitches along the other side of the toe and k around to the marker.
5. K an additional 3(5, 7, 9, 11) rounds
6. **SSK first 2 stitches on needle 1, K remaining stitches on needle 1.
K2tog the first 2 stitches of the toe, K across to last 2 stitches, SSK
K to last 2 stitches of needle 3, K2tog **
Repeat ** to ** until only 2 stitches remain on the toe needle.
Slip the 2 remaining toe stitches onto their nearest DPN and Kitchener the sole closed. Pull the yarn to the inside and weave in.
Repeat for leg 2.

footies with hat, size small
pic'd with hat, pattern coming soon!


Drawstring: Knit an I-cord, crochet a chain, or twist a drawstring, and weave through the waistband.

© Copywrite 2010 by Amy O’Holleran. This pattern is for personal use only. Items made using this pattern may not be produced for sale without my express permission. Thank you!


A huge thank you to all of my testers for their amazing help, and a special thanks to Sally for the use of her pictures (the mint and purple colorway)!!

Become an authoerized Li'l Aries Longies retailer!
Pin It

Monday, December 7, 2009

Recycled Sweatshirt Preflats

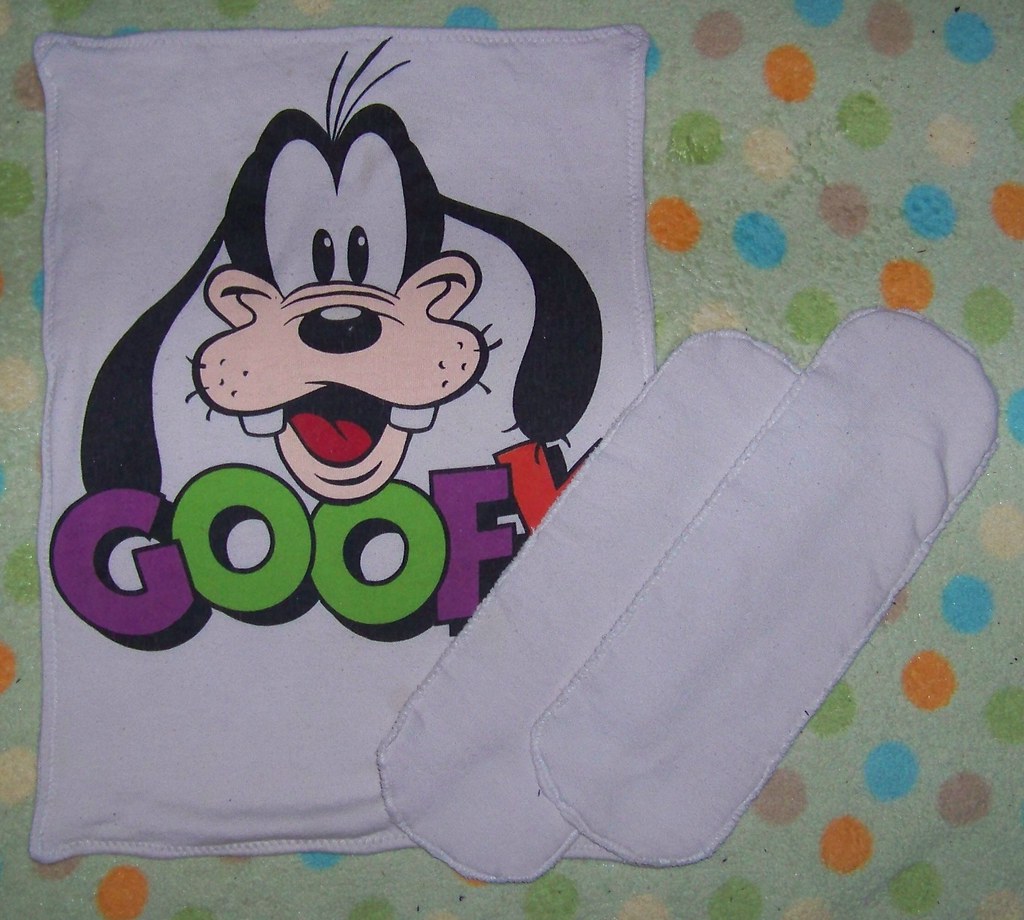
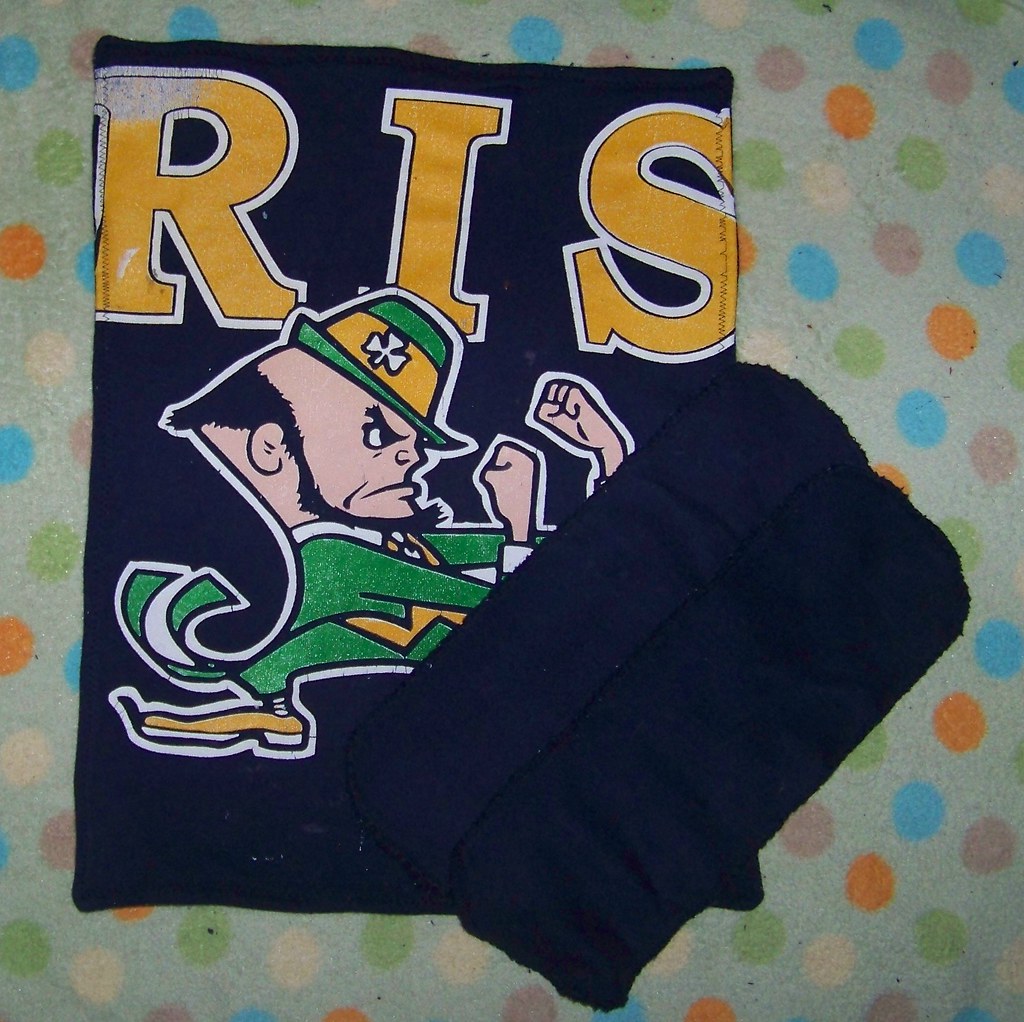
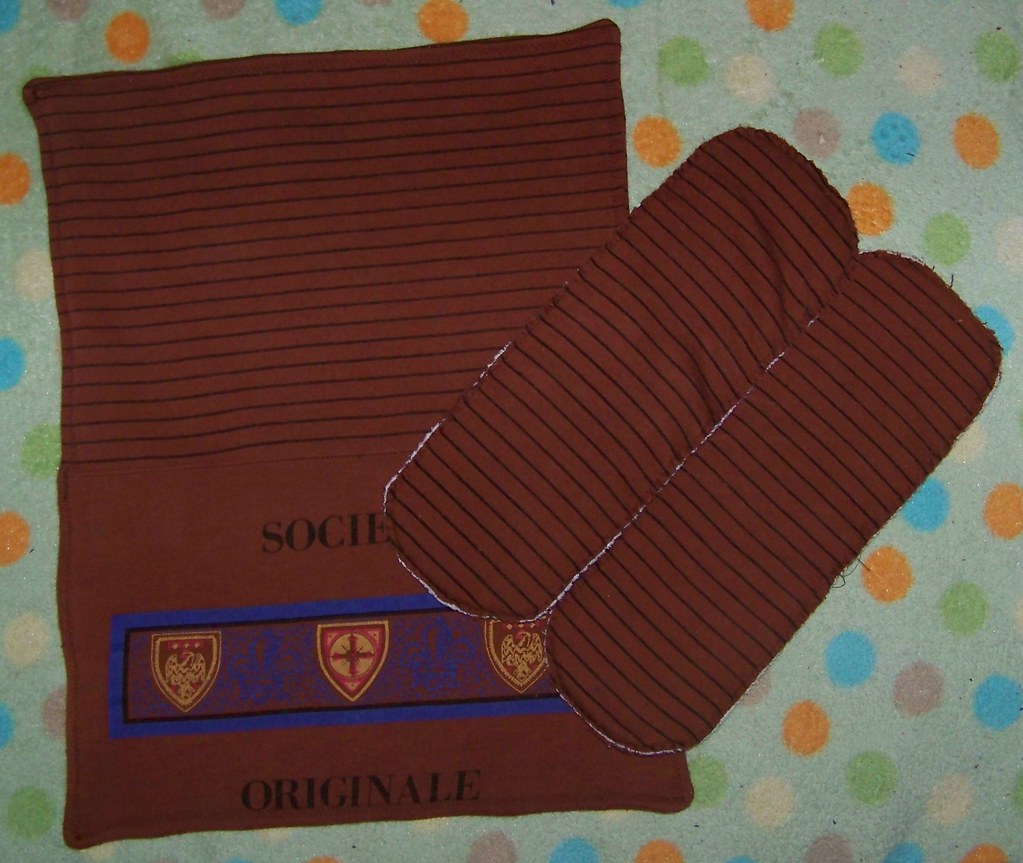
Recycled sweatshirt preflat diapers and doublers.

I made mine 'toddler' size, but basic size measurements are:

Preemie- 8 X 11 inches (cut fabeic 8.5 X 11.5) fits small babies & newbies to 10 lbs

Infant- 10 X 13.5 inches (cut fabeic 10.5 X 14) fits newborn through 15 lbs

Regular- 13 X 18 inches (cut fabeic 13.5 X 17.5) fits aprox. 15 lbs on up

Toddler- 15 X 19 inches (cut fabeic 15.5 X 19.5) fits aprox. 30+ lbs

Cut rectangular panels from the front and back of your cotton (or mostly cotton) sweatshirts using the specified measurements listed above for the size you are making. If you have a serger, you can cut to the first measurement listed, but for a regular sewing machine, cut the full size. Place right sides together and zigzag around (do not PULL the fabric through from the back, but gently push it through from the front...pulling will stretch the fabric and cause a 'lettuce' edging.)at about 1/4 inch from the edge, using a long stitch width and length (I used a 4 for width and a 3 for length on my machine) leave a couple of inches open for turning. Trim corners and turn, pin closed the opening and straight stitch closed at about 1/8 inch, just for the opening. Switch to zigzag and move over to a 1/4 inch, continuing evenly around the diaper, past the straight stitched opening to where you began to zigzag. Using the zigzag maintains the stretchiness of the fabric. Trim your strings, and done!

For doublers I usually prefer to do no more than 3 layers so that they do not take too long to dry. I cut each layer 5 X 14 inches, with rounded off ends, then overlock stitched around. If you do not have an overlock option on your machine, you can use the longest zigzag width you have with a shorter stitch lengeth (on my machine it would be a 5 for width and a 1 for length) Again, do not pull the fabric through, but push it.


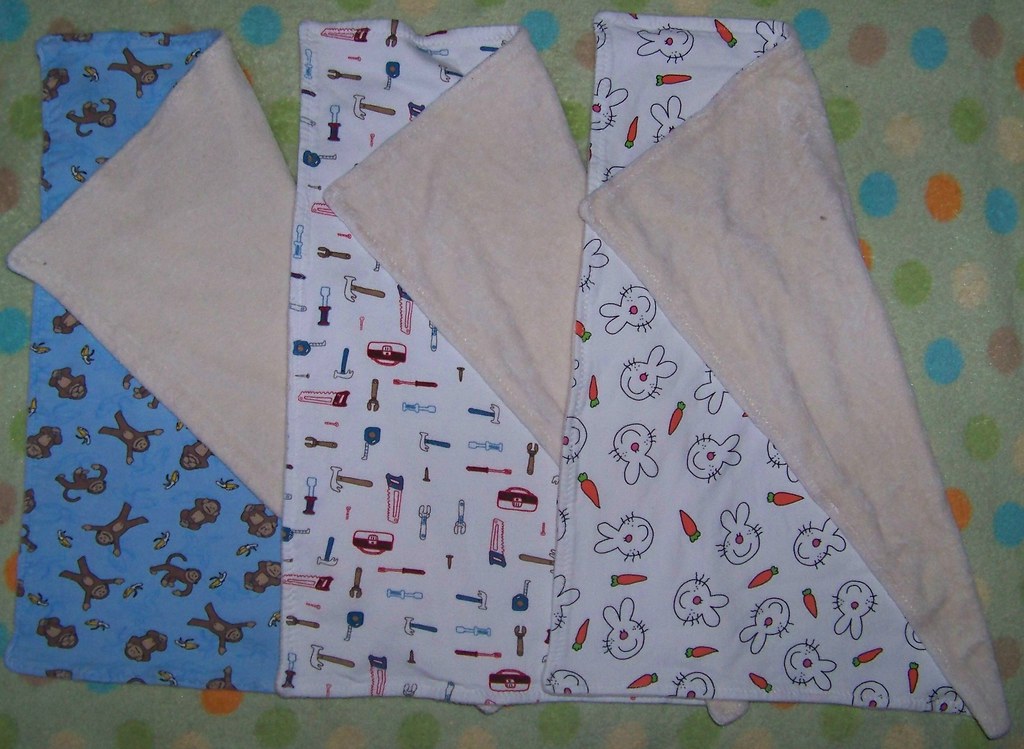
This technique also works quite well with new fabrics...

Here I have used organic cotton and bamboo velour (first one is cotton, the other 2 bamboo) on one side, and a cute cotton knit print on the other.

Pin It

Thursday, November 5, 2009

It started with a pile of felt


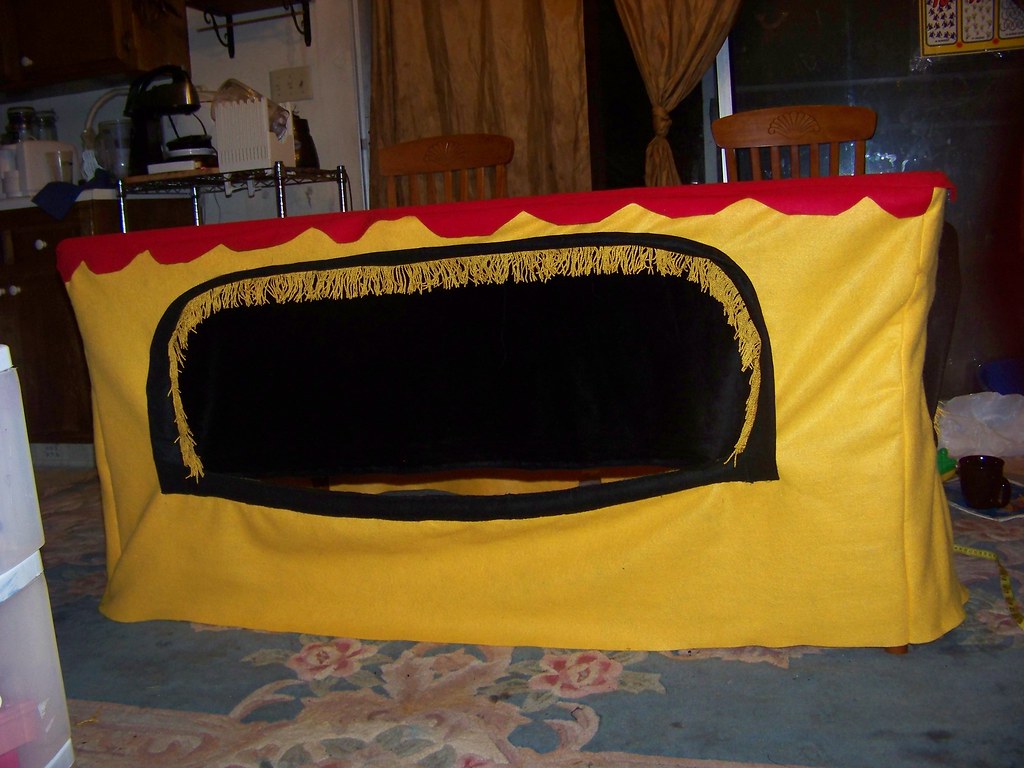
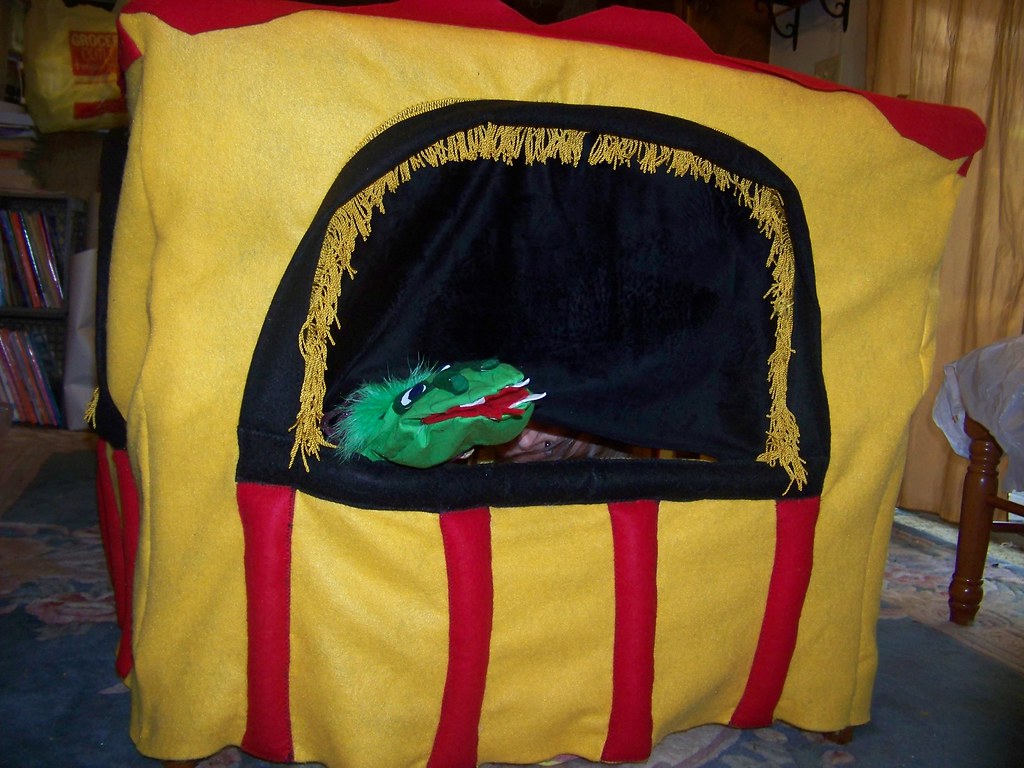
Felt Puppet Theatre
Originally uploaded by tangledskeins
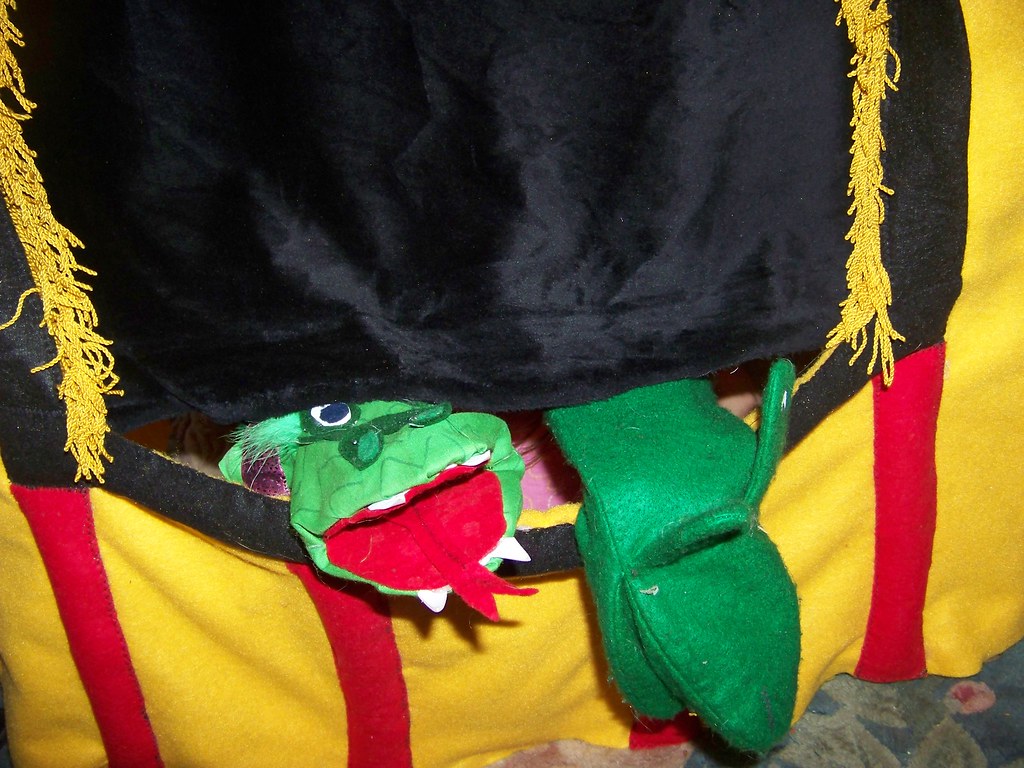
Ok, truely it started with a Diaperswappers challenge, LOL. The ladies in the Craft Chat forum were discussing making card table playhouses out of felt like this one. My girlies already have the "Rose Petal Cottage" so really were not in need of another playhouse. What they needed was a puppet theatre (since the paper mache one we had made was an unfortunate casualty of a large rainstorm,LOL). So a trip to Joann's was in order! A huge pile of felt later we were ready to begin. The girls were entranced by the idea even before the felt was cut, and were already playing under the table...I could have just stopped there, LOL. Nope...had to continue! I measured the dining table and cut the felt for the top and sides of the theatre. I cut super large 'windows' on three of the sides...initiating the REAL challenge of the design...how to keep the windows from drooping (and a 19mos old from crawling through them!). I had originally planned to just sew the window sills, fringe trim and Minkee curtains (oh how I LOVE Minkee!!) on, but it was soon apparent that was not going to be sufficient. Next step, stuffing the bottom sills...well, that helped some, but there was still some droop...of course I didn't realize that until I had all 4 walls sewn together...lovely hindsight, LOL.


So the real wrestling match began. Pinning, stuffing, and sewing the support 'stripes' under the windows. It worked beautifully, and looks like it was planned that way, LOL, but oh it was a bear to do! If I make any more of these in the future (or if any of you decide to try and tackle this idea) I'll have to remember to do the supports BEFORE sewing the walls together!! We have lots of happy little puppeteers, though, so it was all well worth it!


Pin It

Thursday, October 15, 2009

Li'l Aries Soaker


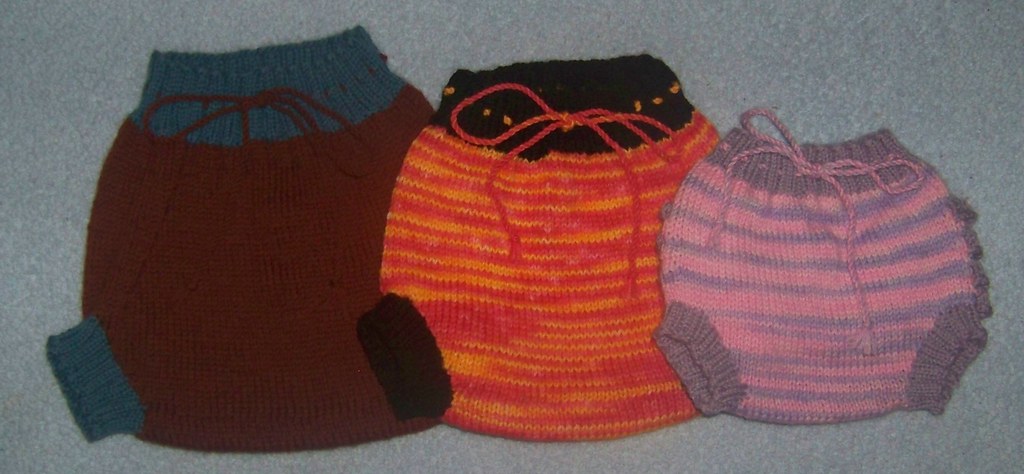
Li'l Aries Soakers
Originally uploaded by tangledskeins
Materials:

Yarn: Worsted Weight Wool
Recommended needles: US 6 straight (for cast on), US 5 circular or DPN’s (for waist and leg cuffs), US 7 circular or DPN’s (for body and girly options), US 8 (for skirty bind-offs)
Stitch markers, at least 3
Stitch holder
Tapestry needle

**Read all instructions carefully first. There are special instructions for girly options.**


Suggested gauge: 5 ½ stitches per inch and 6 rows per inch in stockinet on US 7

General measurements (unstretched to slightly stretched)
NEWBORN= WEIGHT up to 11lbs WAIST 11-15 in. RISE 14-15in. THIGHS 6-11 in.
SMALL= WEIGHT 11-17 lbs WAIST 12-18 in. RISE 15-16 in. THIGHS 7-12 in.
MEDIUM= WEIGHT 15-20 lbs WAIST 12.5-20 in. RISE 16-17 in. THIGHS 8-13 in.
LARGE= WEIGHT 20-24 lbs WAIST 13-22 in. RISE 17-18 in. THIGHS 9-14 in.
X-LARGE= WEIGHT 25lbs+ WAIST 14-24 in. RISE 18-19 in THIGHS 10-15 in


Instructions are for Newborn(Small, Medium, Large, Extra Large)


Waist band:

Cast on 64(80, 96, 112, 128) stitches on US 6 needle (maintains stretch). Transfer stitches to US 5 circular or DPN’s, place stitch marker and join in a loop.

1. K2P2 Rib for 8(10, 12, 14, 16) rounds


Body:

Switch to US 7 circular or DPN’s
1. K4(5, 6, 7, 8), M1 (Insert left needle from the front and pick up the bar between the stitches, knit into the back.), around. (80, 96, 112, 128, 144 stitches)

2. K 2(3, 4, 5, 6) rounds.

3. K 20(24, 28, 32, 36) stitches, place hip marker, K 40(48, 56, 64, 72) stitches, place hip marker, K remaining 20(24, 28, 32, 36) stitches.


4. Work Wrapped Short Row Set:
Work around to the turning point (second hip marker placed), turn, yo purl-wise….bring yarn behind needle and insert needle into first stitch purl-wise…Purl across to the turning point (first hip marker placed), turn, yo knit wise…bring yarn in front of needle and insert needle into first stitch knit-wise, Knit across to the last stitch before the marker, slip that stitch purl-wise, remove marker, replace stitch on left needle, place marker on right needle. K2tog (yo and 1st stitch after the ‘gap’) Continue knitting around past the joining marker, to the stitch before the next hip marker. Slip that stitch knit-wise, remove the marker, slip the next stitch knit-wise, knit those 2 stitches together (as in SSK), place marker on right needle. Continue knitting around to the joining marker.

5. K 2(3, 4, 5, 6) rounds.

6. Repeat 4-5 3 more times.

7. K 15(19, 23, 27, 31) stitches. Bind off the next 5 stitches. K 39(47, 55, 63, 71) stitches {40, 48, 56, 64, 72 stitches including last live loop from bind-off}. Bind off next 5 stitches. K remaining 14(18, 22, 26, 30) stitches {15, 19, 23, 27 31 stitches including last live loop from bind-off}

8. K across to the last 2 stitches before the bind-off, K2tog, turn

9. P across to the last 2 stitches before the bind-off, P2tog, turn

10. Repeat 8-9 until 18(24, 30, 36, 42) stitches remain.

Cut tail to weave in, place stitches on stitch holder.

11. Join yarn on back side with right side facing and repeat 8-9 until 18(24, 30, 36, 42) stitches remain.
Cut approximately 18(20, 24, 28, 30) inch minimum tail to work Kitchener seam: Place stitches from front and back on straight or DPN’s, with back side facing and wrong sides together. Thread tail onto tapestry needle

Always keep yarn below needles…
1. Insert tapestry needle into the 1st stitch on the front needle as if to purl.
2. Insert tapestry needle into the 1st stitch on the back needle as if to knit.
3. Insert tapestry needle into the 1st stitch on the front needles as if to knit and remove stitch from the needle.
4. Insert tapestry needle into the next stitch on the front needle as if to purl.
5. Insert tapestry needle into the 1st stitch on the back needle as if to purl and remove stitch from the needle.
6. Insert tapestry needle into the next stitch on the back needle as if to knit.

Repeat steps 3 to 6 until all stitches are bound off.


Leg Cuffs:

1. Pick up 44(48, 52, 56, 60) stitches, or multiples of 4, around leg opening on US 5 DPN’s.

2. K2p2 rib for 4(6, 8, 10, 12) rounds.

3. Bind off in pattern on US 6 needle.

Repeat for the second leg opening.

101_2168
The ribbing pattern offers a snug but stretchy leg cuff.


Weave in and trim all ends.


Drawstring:

Knit an I-cord, crochet a chain, or twist a drawstring, and weave through the waistband.

Large, Medium, Small


GIRLY OPTIONS:

Skirties


Rumba Butt:

Rumba

Special Instructions: Work second round after each short row set, from hip marker to hip marker across the back, in PURL (40, 48, 56, 64, 72 stitches) Continue with these instructions after completing soaker. Uses approx. 70(80, 90, 100, 110) yards additional yarn.

1, Pick up 40(48, 56, 64, 72) stitches in purl bumps on US 7.

2. Purl across, turn.

3. (K2, yo) across, K2, turn.

4. Purl across, turn.

5 (K3, M1) across, K2, turn.

6. Purl across, turn

7. Bind off.

Repeat for each set of purl bumps down the back of the soaker. Use the tails from each pick-up and bind-off to sew down the ends of each ruffle. Weave in and trim all ends. Dampen and finger block as needed.


Flirty Eyelet Skirty:

Flirty

Special Instructions: Work round 2 after the first short row set in PURL (80, 96, 112, 128, 144 stitches). Continue with these instructions after completing the soaker. Uses approx. 110(130, 150, 170 190) additional yards of yarn.

1. Pick up 80(96, 112, 128, 144) stitches around the soaker on US 7 circular or DPN’s.

2. Knit around.

3. (K4, yo) around.

4-6. K around.

7. (K5, yo) around.

8-10. K around.

11. (K6, yo) around.

12-14. K around.

15. (K7, yo) around.

16-18. K around.

19. (K8, yo) around.

20-22. K around.

23. (K7, K2tog, yo) around.

24-26, K around.

27. Repeat 23-26 for desired length.

Trim:

1. K around.

2. (K2, yo) around.

3. K around.

4. Bind off.

Weave in and trim all ends.


Cheer Skirty:

Cheer

Special Instructions: Work round 2 after the first short row set in PURL (80, 96, 112, 128, 144 stitches). Continue with these instructions after completing the soaker. Uses approx. 125(175, 200, 250, 275) additional yards of yarn.

1. Pick up 80(96, 112, 128, 144) stitches around on US 7 circular or DPN‘s.

2. Knit around.

3. (K8, M1Purl-wise) {Insert left needle from back and pick up the bar between the stitches, purl into the front}, around.

4-5. (K8, P) around.

6. (K8, P, M1Purl-wise) , around

7-8. (K8, P2) around.

9. (K8, P2, M1Purl-wise) , around

10-11. (K8, P3) around.

12. (K8, P3, M1Purl-wise) , around

13-14. (K8, P4) around.

15. (K8, P4, M1Purl-wise) , around

16-17. (K8, P5) around.

18. (K8, P5, M1Purl-wise) , around

19-20. (K8, P6) around.

21. (K8, P6, M1Purl-wise) , around

22-23. (K8, P7) around.

24. (K8, P7, M1Purl-wise) , around

25-30. (K8, P8) around. (Repeat an additional 10 rounds for Small, 20 rounds for Medium, 30 rounds for Large, 40 rounds for Extra Large.)

Bind off in pattern.

Weave in and trim all ends.

Get the .pdf here!...Li'l Aries Soaker .pdf

© Copywrite 2009 by Amy O’Holleran. This pattern is for personal use only. Items made using this pattern may not be produced for sale without my express permission. Thank you!


Become an authorized Li'l Aries Soaker Retailer
Pin It

Saturday, October 3, 2009

The Dream Scarf


Kelly's 'dream' scarf
Originally uploaded by tangledskeins
Yarn: Knit Picks Suri Dream ( 74% Suri Alpaca, 22% Peruvian Highland Wool, 4% Nylon) or a comparable yarn in 3 colors. Designate one as A, one as B, and one as C. Example uses Knit Picks Suri Dream in A:Gloxinia, B:Natural, and C:Aegean
US 11 and US 15 needles

Cast one 220 stitches on a US 15 needle (to maintain stretch) using long tail cast-on
knit onto US 11 (use until bind off)
knit in garter throughout in rows as follows:

2 rows in color A
4 rows in color B
4 rows in color C
4 rows in color A
4 rows in color C
4 rows in color B
3 rows in color A
bind off in color A using US 15
Pin It

Friday, September 18, 2009

Amy's Wrap, Newborn


101_2081
Originally uploaded by tangledskeins
I finished reworking my wrap pattern for newborns last night (as requested on the Yahoo Wool Soaker Group)

Using the original pattern (Crochet Wrap)...sized down in this manner...

Foundation chain with F hook
Rows 1-3 worked with D hook, switching back to the F at the final Ch1
Rows 4-60 worked with F hook, switching back to the D at the final Ch2
Rows 61-63 and side finishing worked with the D hook.

Back waistband measures 13 inches
Front waistband measures 9 inches
Rise measures 13 inches
Crotch width measures 8 inches
(all measurements unstretched)

101_2083
Pin It