Friday, February 22, 2008

Crochet Wrap pattern

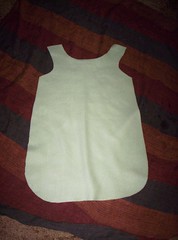
I worked this one up a few years ago after trying the Tickle Turdle pattern, and really not liking how it was turning out. I frogged the work I had done on that pattern, and came up with this one instead.

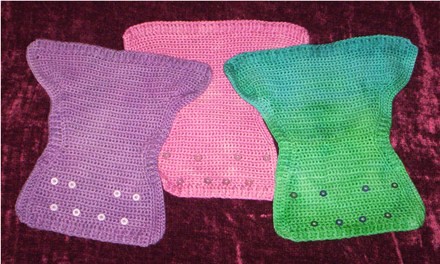
Amy's Diaper Wrap Pattern

With size I hook and Lion Brand Fisherman's Wool

Ch 52
Row 1. DC in 3rd ch from hook and in each ch across, turn.
Row 2. Ch2 (counts as first dc), **fpdc (frontpost double crochet) around next dc, bpdc (backpost double crochet) around next dc**, repeat **/** across. Turn.
Row 3. Ch2 (counts as first dc) ** bpdc around next dc, fpdc around next dc**, repeat **/** across. Ch1,Turn.
Row 4 SC in each dc across, ch1, turn
Row 5-13 Repeat Row 4
Row 14 Insert hook into first sc, yo (yarn over) and draw up a loop, insert hook into second sc, yo and draw up a loop, insert hook in 3rd sc, yo and draw loop through all loops on hook, this is a 'gather'. SC in each sc across to the last 3 sc's, and repeat gather. Ch1, turn.
Row15-18 Repeat Row 14
Row 19 SC in each stitch across (you should have 31 sc's), Ch1, turn.
Rows 20-26 Repeat Row 19
Row 27 Insert hook into first sc, yo and draw up a loop, insert hook into second sc, yo and draw up a loopyo and draw through all loops on hook (decrease made), sc in each sc acrsoss to last 2 sc, repeat decrease, ch1, turn. (29 sc's)
Row 28 SC in each sc across, ch1, turn. (29 sc's)
Row 29 Decrease, sc in each sc across to last 2, decrease, ch1, turn. (27 sc's)
Row 30 SC in each sc across, ch1, turn (27 sc's)
Row 31 Decrease, sc in each sc across to last 2, decrease, ch1, turn (25 sc's)
Row 32 SC in each sc across, ch1, turn (25 sc's)
Row 33 Decrease, sc in each sc across to last 2, decrease, ch1, turn (23 sc's)
Row 34 SC in each sc across, ch1, turn (23 sc's)
Row 35 Decrease, sc in each sc across to last 2, decrease, ch1, turn (21 sc's)
Row 36 SC in each sc across, ch1, turn (21 sc's)
Row 37 2 sc in first sc (increase made), sc in each sc across to last sc, 2 sc in last sc (increase) ch1, turn (23 sc's)
Row 38 SC in each sc across, ch1, turn. (23 sc's)
Row 39 Increase, sc in each sc across, increase, ch1, turn. (25 sc's)
Row 40 SC in each sc across, ch1, turn. (25 sc's)
Row 41 Increase, sc in each sc across, increase, ch1, turn. (27 sc's)
Row 42 SC in each sc across, ch1, turn. (27 sc's)
Row 43 Increase, sc in each sc across, increase, ch1, turn. (29 sc's)
Row 44 SC in each sc across, ch1, turn. (29 sc's)
Row 45 Increase, sc in each sc across, increase, ch1, turn. (31 sc's)
Row 46 SC in each sc across, ch1, turn (31 sc's)
Row 47-59 Repeat Row 46
Row 60 SC in each sc across, ch2, turn
Row 61 Let ch2 count as first dc, dc in each sc across, turn (31 dc's)
Row 62 Ch2 (count as first dc) **fpdc around next dc, bpdc around next dc** repeat **/** across, turn
Row 63 Ch2 (count as first dc) **bdpc around next dc, fpdc around next dc** repeat **/** across, finish off.
Side finishing: (use size G hook)
Row 1 Join with slip stitch in the side of the last dc made, sc once in the side of each dc (3 sc's) and evenly along entire edge (mark with a contrasting color where the increases and decreases begin/end...this will help with later fp/bp placement), ch 1, turn.
Row 2 sc for first 10 sc's, then dc in each remaining sc across, ch1, turn.
Row 3 sc across to point where increases begin, **fpdc around next dc, bpdc around next dc**, Repeat **/** across to end of decrease section, sc across to end, ch1, turn.
(OPTONAL ROW...IF YOU WANT A TRIMMER FIT FINISH OFF AFTER LAST SC OF THE PREVIOUS ROUND)
Row 4 SC across to dc's, **bpdc around next dc, fpdc around next dc** across all dc's, sc across to end, finish off.

Repeat side finishing on opposite side, using first side as a guide for placement of fpdc's and bpdc's (mirror image)

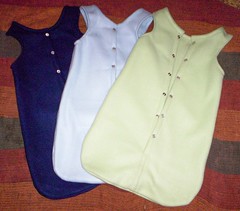
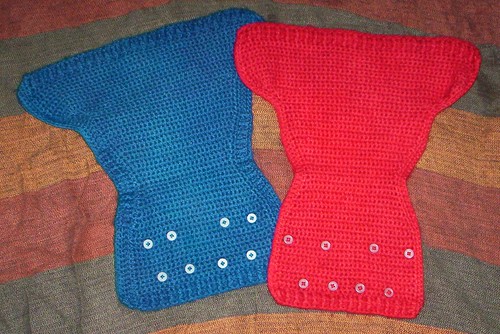
Attach buttons, or velcro if desired, or use a snappi or pins for closure.
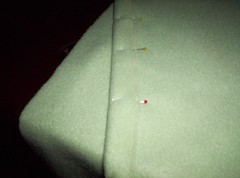
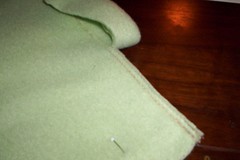
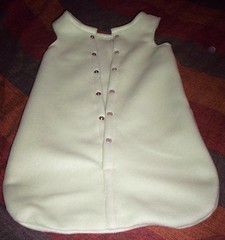
button placement, and how I prevent leg gaps on the small setting...(click image for a larger picture)

PhotobucketPhotobucket
Pin It

Little Fire Crochet Soaker & Skirty Pattern


100_3735
Originally uploaded by tangledskeins
((***Pattern updated 01/09/09***))
Named for my DS, this is the

(I have had a few people mention that they were having trouble getting the waistbands of the Little Fire wooly patterns loose enough to have enough stretch, even when using a larger hook for the foundation. I have found the answer...the no-chain foundation!! If you go here No Chain and scroll down to the bottom of the page, you will find pictorial instructions for doing the No Chain Double Crochet. Work this technique to length (one less dc than the number of dc's called for in the pattern) in place of the foundation chain and first row of dc in both Little Fire Patterns.
I tried it out myself on the Pirate shorties I made for my son (incorporating a little stranding for a bit of fun) and it worked out fabulously. There is a small V at the join when following this technique, but it is easily stitched closed with the tail. The resulting stretchy waistband top is wonderful!)

Little Fire Crochet Soaker and Skirty

Initial instructions are for size small, parenthesis are for medium, large, and extra-large
This pattern is worked with worsted weight wool yarn
Hook size G, Gauge 4 stitches per inch, 4 rows per inch in sc or whatever hook you need to maintain gauge.
All Sizing is Approximate:
SMALL= WEIGHT 11-17 lbs WAIST 12-20 in. RISE 16 in. THIGHS 7-12 in.
MEDIUM= WEIGHT 15-22 lbs WAIST 12.5-20 in. RISE 17in. THIGHS 8-13 in.
LARGE= WEIGHT 20-26 lbs WAIST 13-22 in. RISE 18 in. THIGHS 9-14 in.
X-LARGE= WEIGHT 24-30 lbs WAIST 14-24 in. RISE 19 in. THIGHS 9-15 in.

Chain 56 loosely (64, 72, 80) Join in a loop with a slip stitch, being sure not to twist the chain

Row 1 CH 2 (count as first DC) DC in each SC around , join with a SLST in the top of the CH 2

Row 2-3 SLST around CH 2 of row 1, CH 2, *BPDC around next st, FPDC around next st* repeat around and join with a SLST in the top of the Ch 2. (Bind off if you plan on using a different color for the body of the soaker, otherwise continue on to Row 4.)

Row 4 (If starting a new color, join with a SLST in the first DC) CH 1, SC in same st, and in next 2 sts, 2 SC in next st, *SC in next 3 sts , 2 SC in next st*, repeat *-* around for a total of 70 SCs (80, 90, 100)

Row 5 Ch1, turn, SC in each stitch around, join with slip stitch in first SC. 70 SCs (80, 90, 100)

Row 6-8 Repeat previous row (for medium repeat row 5 times, for large repeat row 7 times, repeat 9 times for xl )

If making a Skirty, work row 9 in the back loops of row 8 for this round only)
Row 9 CH1, turn, SC in first 2(3, 4, 5) st, HDC in next 4(5, 6, 7) sts , DC in in next 23(24, 25, 26)sts, HDC in next 4(5, 6, 7) sts, SC in remaining 37 (43, 49, 55) sts, join with SLST to first SC.


Row 10-13 Repeat Rows 6-9 once

Row 14 Repeat row 6 once more

Row 15-17 CH1, turn, work 39 SCs (43, 47, 51)

Row 18 CH1, turn, SC in first 2(3, 4, 5) st, HDC in next 4(5, 6 7) sts, dc DEC next 2 sts together, *(DC in next 3 sts, dc DEC next 2 sts together) across to last 6(8, 10, 12) HDC in next 4(5, 6 7) sts, SC in last 2(3, 4, 5) st 33(37, 41, 45)sts

Row 19-21 CH1, turn work 33 SCs (37, 41, 45)

Row 22 CH1, turn, SC in first 2(3, 4, 5) st, HDC in next 3(4, 5, 6) sts, dc DEC next 2 sts together, (DC in next 5 sts, dc DEC next 2 sts together) across to last 5(7, 9, 11) sts, HDC in next 3(4, 5, 6) sts, SC in last 2(3, 4, 5) st. 29(33, 37, 41)sts

Row 23-25 CH1, turn work 29 SCs (33, 37, 41)

Row 26 CH1, turn, SC in first 2(3, 4, 5) st, HDC in next 2(3, 4, 5) sts, dc DEC next 2 sts together, DC in next 2 sts, dc DEC next 2 sts together, DC in next 2 sts, dc DEC next 2 sts together, DC in next st, dc DEC next 2 sts together, DC in next 2 sts, dc DEC next 2 sts together, DC in next 2 sts, dc DEC next 2 sts together, HDC in next 2(3, 4, 5) sts, sc in next 2(3, 4, 5) st. 23(27, 31, 35)sts

Row 27-29 CH1, turn work 23 SCs (27, 31, 35)

Row 30 CH1, turn, SC in first 2(3, 4, 5) st, HDC in next 1(2, 3, 4) sts, dc DEC next 2 sts together, (DC in next 3 sts, dc DEC next 2 sts together) across to last3(5, 7, 9)sts, HDC in next 1(2, 3, 4) sts, SC in last 2(3, 4, 5) st 19(23, 27, 31)sts

Row 31-41 CH1 turn, SC in each st across 19(23, 27, 31)sts(for mediums add 4 more rows here, for larges add 8 more, for xl add 12)

Row 42-52 CH 1 turn, SC in next st, 2 SC in next st, SC across to last 2 sts, 2 SC in next st, SC in last st
(final row should have 39 (43, 47, 51)SCs
Whip stitch evenly to front side of soaker (bottom of row 14)


Cuffs
Join yarn with SLST

Row 1 join with sl st at top of leg opening,CH1, SC in same st, work an even # of sc’s around the opening, join with SLST to first SC

Row 2 CH2 (count as first DC) DC in each st around and join with a SLST to top CH of CH2

Row 3 SLST around CH 2 of row 1, CH 2, *BPDC around next st, FPDC around next st* repeat around and join with a SLST in the top of the Ch 2.

Bind off

Repeat for other side, weave in ends, trim, Voila! Add a cord at the waist if you desire.


Skirty patterns for the Little Fire soaker

Version 1:
R1 After finishing the main body of the soaker, join yarn for skirty with a slip stitch at the back, working in the free loops of row 8. Sc in first st. ch4, (skip st and sc in next st, ch 4) around. Join with a sl st in the first sc.

R2 Work 2 sl sts around the ch4 space, work 1 sc around ch4, ch5, (sc in top of next ch4 sp. Ch5) around, join with a sl st in 1st sc.

R3+ Work round 2 until skirty is the desired length, bind off, weave in, voila!

TRIM ch1, sc in same st, work 6 sc in ch5 sp, ( sc in sc, work 6 sc in ch5 sp ) repeat around, join with a sl st in the first sc, bind off, weave in, voila!

Version 2:

R1 Working in the free loops of round 8, Join yarn with a slip stitch at the back of the soaker, ch1 and sc in the same st., and in each st around. join with a sl st in the first sc.

R2 ch2 (count as first dc) dc ch1 dc in next st, (dc in next st cd ch1 dc in next st), around, join with a sl st at the top of ch2.

R3 ch2 (count as first dc now and throughout) sk 1 dc, dc ch1 dc in ch1 sp, sk 1 dc, dc in next dc, sk 1 dc, dc ch1 dc in next ch1 sp, sk 1 dc, cd in next dc *( dc in next dc. sk 1 dc, dc ch1 dc in next ch1 sp, sk 1 dc, dc in next dc, sk 1 dc dc ch1 dc in next ch1 sp, sk 1 dc, dc in next dc) around, and join with a sl st at the top of the ch2.

Repeat R3 for length.

TRIM work 6 st dc shell in ea ch1 sp around for trim.


Version 3

R1 Working in the free loops of round 8, join yarn with a sl st at the back of the soaker, ch 1 and sc in same st, sc in next st and in each st around, join with sl st in first sc.

R2 ch2 2 dc in next st, (dc in next st, 2 dc in next st) around and join with a sl st in the top of ch2

R3 ch2(count as dc when repeating for pattern), dc in same st, dc in next dc, ch1, dc in next dc, 2 dc in next dc, dc in next dc, ch1, dc in next dc, 2dc in next dc, repeat around for pattern and join with a sl st at the top of ch2.

R4 ch3, (count as dc and ch1 when repeating for pattern) dc in next dc, dc in next dc, dc in ch1 sp, dc in next dc, dc in next dc, ch1, dc in next dc, dc in next dc, dc in ch1 sp, dc in next dc, dc in next dc, ch1, dc in next dc, Repeat around for pattern and join with a sl st in second ch.

R5 ch2(count as dc dc when repeating for pattern), dc in ch1 sp, dc in next dc, dc in next dc, ch1, sk 1 dc, dc in next dc, dc in the next dc, dc in ch1 sp, dc in next dc, dc in next dc, ch1, sk 1 dc, dc in next dc, dc in next dc, dc in ch1 sp, dc in next dc, repeat around for pattern and join with a slst at the top of ch2.

R6 Ch3 (count as dc and ch1 when repeating for pattern) dc in next dc, dc in next dc, dc in ch1 sp, dc in next dc, dc in next dc, ch1, sk 1 dc, dc in next dc, dc in next dc, dc in ch1 sp, dc in next dc, dc in next dc, ch1, sk1 dc, dc in next dc, Repeat around for pattern and join with a sl st in the top of ch2

Alternate rounds 5 and 6 for length.

For trim, ch2, dc in same dc, work 2 dc in each dc and ch1 sp around, and join with a sl st in the top of ch2


© 2008-by Amy O’Holleran: This is my original work, and may not be reproduced for sale without my express permission.

Become a Little Fire Retalier!
Pin It

Wednesday, February 20, 2008

A little dye job...

So for some reason my darling hubby didn't want his baby boy wearing pink and purple diaper covers...soooo

I redyed them...

here is a pic of them before...

I kept the green verigated one the same...just redid the pink and purple...

Much more boyish now, don't ya think? It took a whole bottle of Deco cake food colors for each one, to cover the old dye, and get the colors as deep and true as I wanted, but I think they turned out great!

Pin It

Tuesday, February 19, 2008

Sew Sew...Making a fleece sleep sack

After searching and searching for fleece sleep sacks in my area, and only being able to find terry ones, I gave up, and decided to make my own.


I got a few yards of fleece at walmart (way more than needed for this project, but I am sure it will be used later ;))


I sketched up a basic pattern, using an infant nightie as a basic model, but made it considerably larger...


Laying the pattern on the fold of the fabric, I cut out 2 peices for each sack...


then cut one in half down the center, and pinned a 3/4 inch seam...


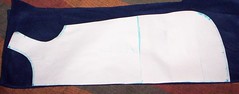
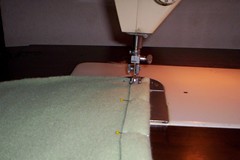
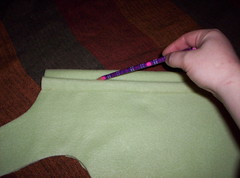
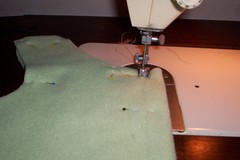
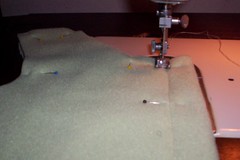
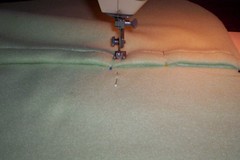
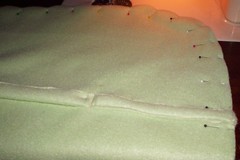
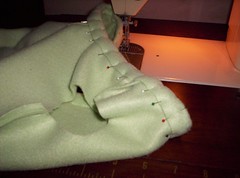
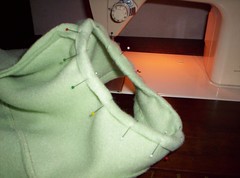
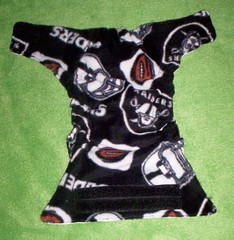
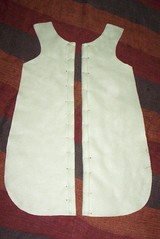
and sewed each side about 1/8 inch from the cut edge (since fleece doesn't ravel, there is no need to turn under)...


Then I pinned the uncut piece in half , and lined up one of the now hemmed cut pieces...


traced a guideline for stitching equal to the hemmed edge of the cut peice...


and stitched along that line, them moved over about 1/8 inch, and stitched a parallel line...


trimmed the excess fabric about 1/8 of an inch from the seam, reserving it for later...


opened the now seamed back piece, and stitched the double seam flat...


Next I aligned the 2 front peices so that the seams overlapped, and stitched the bottom 5 inches together...


I then layered front and back with right sides together, pinned, and stitched the sholders and body together with a 1/4 inch seam allowance...


Using the strip reserved from earlier, I pinned it around the neck opening, and sewed with a 1/8 seam allowance...


then folded down the armholes, pinned them, and stitched a 1/8 inch seam allowance...


Then turned the whole thing right side out, and measured for snap placement...I set mine every 3 inches...(you could used velcro, zipper, or snap tape here if you don't have a snap setter)...


and set the snaps in the marked places...


VOILA!!! Cute and cozy sleep sack!


Here are the 3 different ones I made...


Get great deals on fleece at Amazon! Pin It

Saturday, February 9, 2008

Sew Sew...Not exactly knittin'

I've been knitting up a storm for our expected little one, but when we were out at Walmart last night, DH spotted some Raiders fleece while we were in the fabric and crafts department, and asked me to make a couple of diaper covers (and a pillow for him, LOL) out of it...I've got one made with the pattern I drafted a while back, with (obviously) a fleece outer, and a PUL inner...and I think it turned out really cute. When he saw it, DH said that I should do up a bunch in all of the NFL patterns and sell them, LOL. It's an idea, but I don't think he realizes how much that would really entail!
Pin It

Friday, February 1, 2008

So my time on here has been pretty touch and go lately, such is the life of a busy mama, but I finally have a new computer...no longer a super slow loaner...this thing absolutely flies! I'm still working on getting all of my software installed, but did get my photo software installed so I could share some pics.

Here are the shorties (Aubrey Doodlepants) that I did with Paton's Merino Denim Marl
They came out looking stonewashed, which I think is really cool. Perfect for a little boy.


Here are the longies (Aubrey Doodlepants) done in Paton's Merino Forest...my husband calls these baby grunge pants...
I love how the striping worked out...it sort of swirls down the body, and then around the legs...couldn't have planned it better if I tried!


Here is the set I did...a freeform hat and longies (Aubrey Doodlepants) to go with the baby's Raiders jersey...gotta love a fanatical husband...
These were done in Paton's Merino Black, and Winter White.


And here is a front and back view of the finished Fishy shorties (Aubrey Doodlepants)

These were done with Knit Picks Wool of the Andes in Stream for the shorties, Knit Picks Wool of the Andes in Pumpkin and Dandelion for the fish applique, and Paton's Merino handdyed Mint for the duplicate stitch waves pattern.


Pin It